Monday 19 December 2016

Piece 'F' - Yarn Painting / Transparent Overlays

Using transparent fabric

There are various types of transparent fabric that can provide may options for use as overlays.  Here are such a sampling as presented by Lorraine at our last meeting.

NETTING - a fabric that is knotted to form a mesh (not woven or knitted)
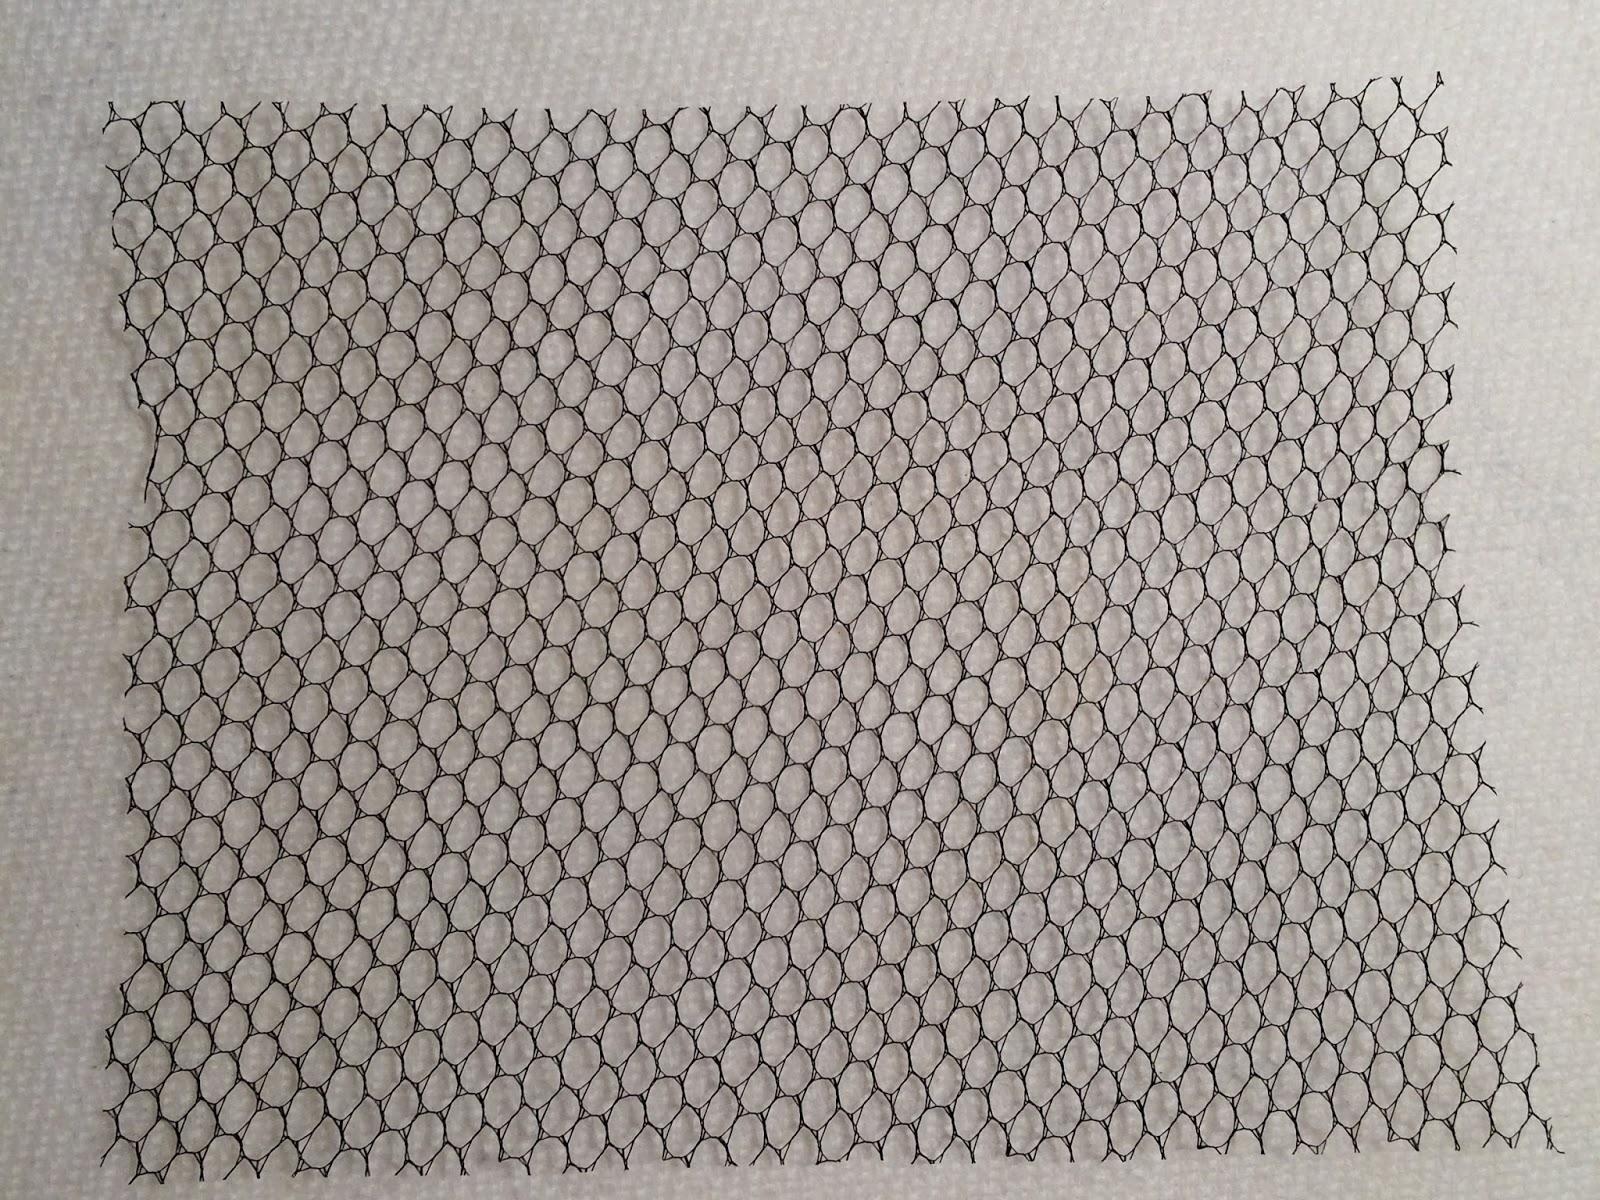
TULLE (Veiling) - hexagonal net (knotted) mesh.  This is a smaller mesh than netting.  It may melt with ironing and can be caught and torn.
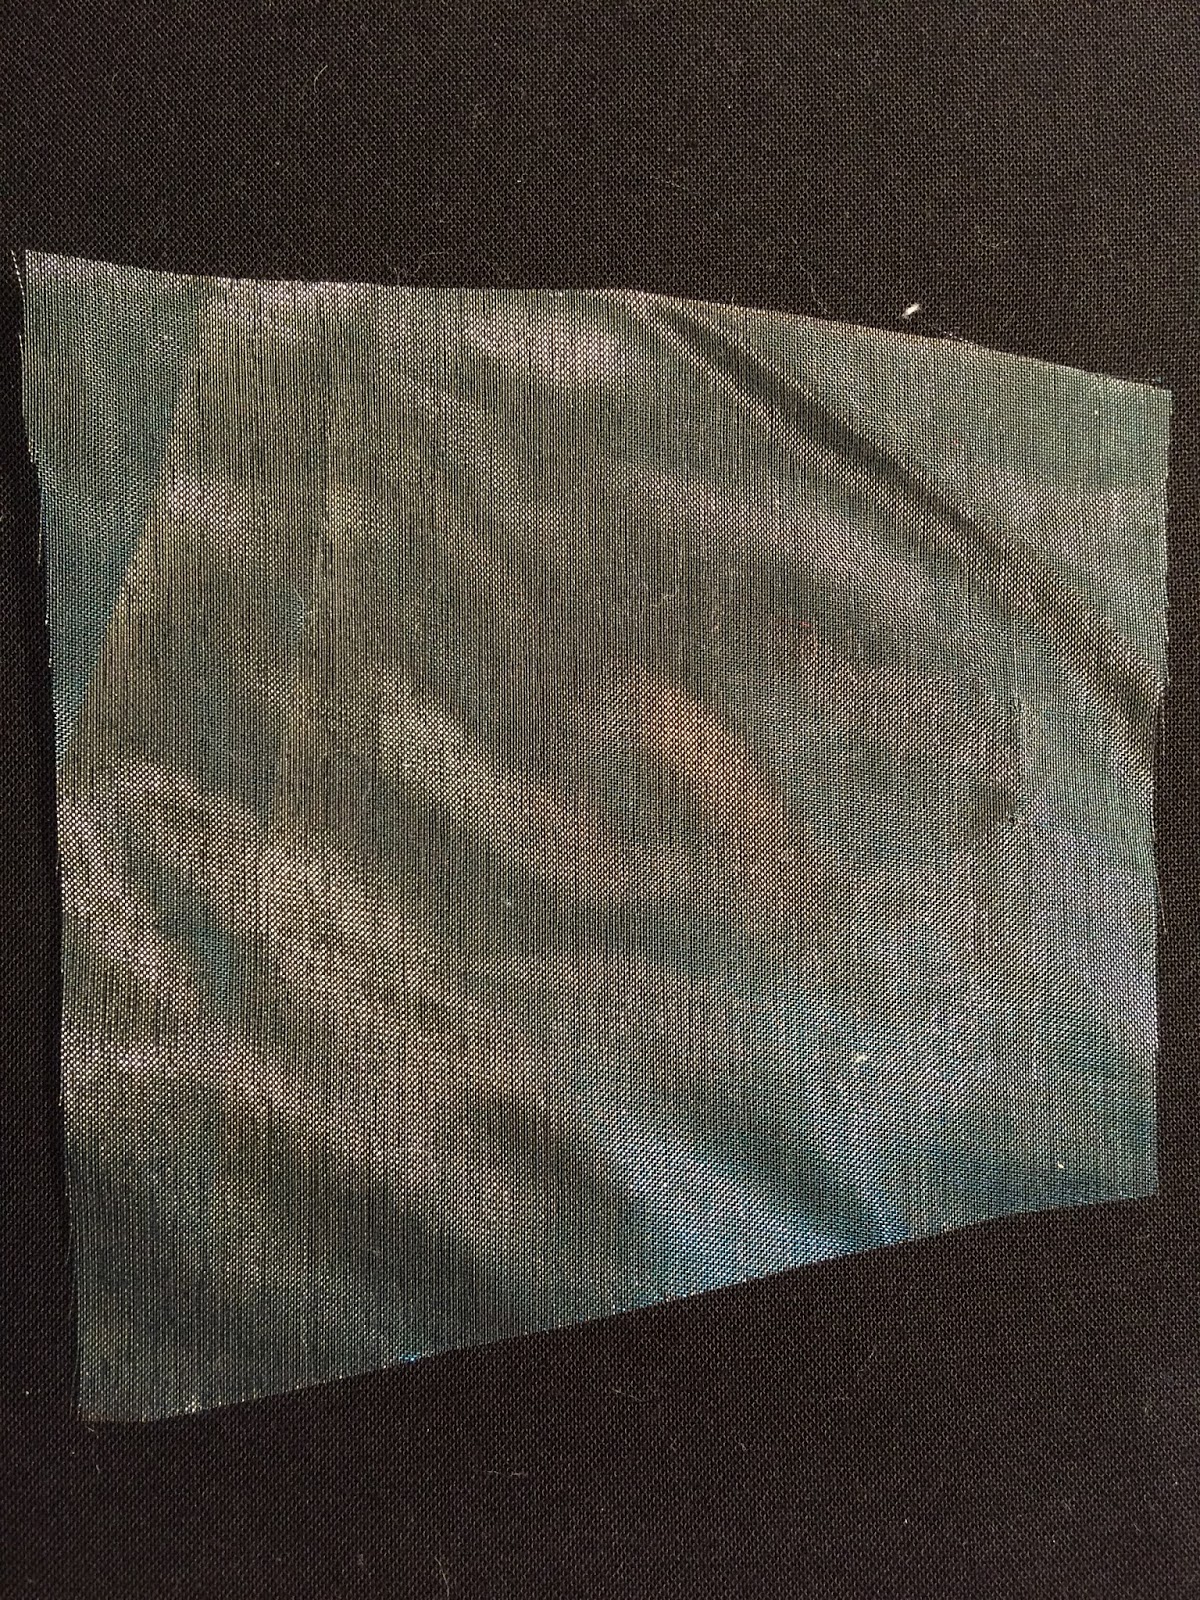
ORGANZA - fine, stiff, wiry, woven fabric.  This is typically silk, viscose (rayon) or polyester.  Similar to organza is organdy.  Organdy is made of cotton and used for interfacings.
CHIFFON is a plain weave, soft filmy fabric and may be made from silk, nylon, viscose, cotton or polyester.  Because it frays easily, it is best to sew on first and then cut close to the stitches, or lay it down using Mistyfuse.  It's also used for embellishing.
 
These transparent fabrics can be used as overlays to produce shading, holding fabric confetti or other items in place, mute the colour or properties of the colour underneath, or add texture.

Using Yarn / Thread


YARN - spun fibres used for knitting, weaving or sewing.  Some samples of yarn are:

Boucle - loops of fibres spun into a core of yarn

 Eyelash yarn - tuffed materials attached to a solid core of yarn
     

Chenille (French for caterpillar) is a yarn with a protruding pile around a core


THREAD - twisted filaments, fibres or fibrous material spun into a length, usually composed of two or more lengths twisted together.

Embroidery Thread - 2-6 ply, cotton, rayon, silk

Yarn or thread can be attached to your quilt by some of the following methods:

Couching - by machine or hand
Felting - needle or embellishing machine
Yarn piping - fold fabric in half, zigzag along the folded edge (this edge is your piping)
Secured under transparent overlay
     - lay down Misty Fuse on base (fabric or batting)
     - lay down yarn(s) in desired pattern
     - place tulle on top
     - stitch

Tips and Tricks Learned Today

Try sewing cording or yarn under the fabric.

Battlizer - batting and stabilizer combined in one product - can get it locally at Pleasant Valley Quilting.

To get the pieces squared for our project Cathy cuts out a piece of cardboard to the correct size. Once she has sewn the 'pillowcase' she turns the project right side out, slips the cardboard inside and then irons it.

Friday 11 November 2016

About Fusible Fleece and Mistyfuse

There were a lot of questions during the demonstrations about using fusible fleece and Mistyfuse so here are some pointers about using each one.


Pellon 987F Fusible Fleece

Instruction for an applique design
  1. Trace a design/pattern to the non fusible side of the fleece, do not cut yet.
  2. Good idea to place a piece of parchment paper under the fleece, ease in transporting to the ironing board.
  3. Arrange the confetti on the fusible side spreading confetti over the border.
  4. Once you’re a happy with the confetti placement layer a piece of sheer fabric over the top.
  5. Now it's time to fuse the confetti to the fleece with a med-warm iron using parchment paper on top. Let it cool and then it's off to the sewing machine.
  6. I use a prewound bobbin with 60 weight thread and 60 weight thread on top. I like to bury the stippling. Upper thread colour is up to you.
  7. Once the stippling is finished cut the design out and fuse to the main quilt top with a satin stitch or free motion back and forth stitch.
Mistyfuse®

Use paperless Mistyfuse® for all weights of fabric from velvet and cotton to delicate tulle and organza.  It's a dream to work with—it handles well, is incredibly sheer, doesn't add bulk and bonds firmly once cooled.  Since there is no added adhesive, it will never gum up your scissors or quilting needles.  Mistyfuse can be used with very sheer fabrics and lower temperatures.

Each package comes with simple instructions for easy fusing with no waste.  Mistyfuse White is perfect for fusing all colors, weights and types of fabric.  Mistyfuse performs the same function as other fusible web products but is very sheer, light weight and does not add stiffness or bulk to the layers of fabric joined. Unlike other fusible web products, Mistyfuse does not have a paper backing.  The absence of a paper backing on Mistyfuse means that you cannot draw your design onto the paper and must therefore use templates when cutting specific shapes from Mistyfuse. Another necessity when using Mistyfuse is a non-stick pressing sheet or parchment paper in order to prevent the Mistyfuse from sticking to your iron or ironing board.


1. Draw your design or applique shape onto freezer paper. Do not reverse.
2. Fuse Mistyfuse to the wrong side of your applique fabric.

  • Use parchment paper or a non-stick pressing sheet to cover your ironing surface
  • Place Mistyfuse on the non-stick sheet
  • Place the applique fabric right side up (wrong side against the fusible) to cover the Mistyfuse completely
  • Press briefly using medium-low heat setting.
  • Fuse a larger piece of fabric than your planned applique piece. Often, people who like using Mistyfuse will pre-fuse larger pieces of fabric so they are ready to cut out for future projects.

3. Press the freezer paper template to the right side of the pre-fused fabric and cut it out. Keep the nonstick sheet under the fusible side of the Misty Fuse.

4. Position the applique and press with medium-high heat to permanently fuse.

Things to remember when using Misty Fuse:


  • It has no paper backing so you MUST use a non-stick pressing sheet (Teflon sheet or parchment paper)
  • It can be used with sheers
  • You will need to make templates if you are making specific shapes
  • You do not need to reverse your design when you draw the design onto freezer paper because the freezer paper will be attached to the right side of the fabric (not flipped).


Piece 'C' - Fabric Confetti

It is done by layering very small pieces of fabric on a backing to create your design.

International fibre artist Noriko Endo uses toothpick sized fabric pieces to create landscapes on cloth that invoke the feeling of Impressionist paintings. Her book Confetti Naturescapes is in the Vernon library.
Confetti is used to add texture, fullness or just to highlight an area.

You can embroider on the confetti and sheer toppings with a design.

There are no limits for using confetti.
 
Cathy G B showed us how to make a forest scene with confetti. She uses very small pieces of fabric, batik, silk etc. (anything that you can use either side of is best).
Cut fabric for confetti
Cut batting the size of your finished quilt, cut backing 1” larger.
Cut the fabric for confetti into larger strips about 20” x 1”, you can layer up to 4 fabric pieces at a time. With your rotary cutter cut the strips into toothpicks, 1/4” squares or totally random shapes.


Put each colour into a different container, ice cube trays work well or small dishes.

Noriko places confetti directly onto the batting, which takes a lot of confetti. Cathy prefers to place the confetti onto a background fabric.


Layer the confetti onto the background until your design is complete. In this demo some solid tree trunks were added as well. A skewer, chopstick, tweezers or similar tool help in moving the confetti into place.

 
Cover with tulle, try different colours but black often works well, pin well and free motion quilt. Match the thread and bobbin to fabric colour you are stitching. Stitch however you free motion stitch, and zigzag on trunks of trees in a highlighting colour.

Noriko Endo often covers her piece in tulle, adds more confetti and then another layer of tulle before stitching.
Discussing which elements of good design are found in the pieces

 Mary M discussed using confetti to make a piece and then appliqué it onto the quilt top. She had a cheerful snowman scene with the tulle behind the confetti appliqué piece and used a sheer over the confetti that gave a gauzy effect.


Cath P covered ‘snippets’ - larger pieces backed with fusible web and carefully placed. These can be random cuts or more specific shapes, e.g.: feathers, flower petals, leaves etc. Tulle can often be omitted with this technique. Parchment paper or a Teflon sheet is recommended when fusing the pieces down, you never get them all the right way up!


A work in progress


Tools for making confetti
Decide on picture, sketch it out onto your background or batting.
Add background fabrics if you wish. Spray baste or Misty Fuse can also be used on the background with larger pieces. Or you can work on the Fusible Fleece.
Place confetti, building up layers until you are satisfied.
Pin well and stitch around outside edge to hold confetti in. Then free motion stitch over top.
Confetti can also be used with dissolvable stabilizer. Sandwich fabric confetti, ribbons etc. between two pieces of stabilizer. You can make it very dense for tree tops or just a few pieces for the last autumn leaves.
Confetti tree


Free motion or zigzag over top. Be sure to stitch through all the pieces
Rinse out well and let dry.
You can pin it to a Styrofoam meat tray to shape it as it dries.
The piece can be cut to smaller size and shapes.
Sew on to quilt top.

It is a great way to add some dimension to trees and flowers.

Websites to check out:

Noriko Endo norkioendo.com

Subversive Stitchers subversivestitch.blogspot.ca July 2009

Confetti Backgrounds for Art Quilts Quilting Daily Blog March 22, 2016
www.quiltingdaily.com/blog/confetti-backgrounds-for-art-quilts

Cathy Geier’s Quilty Art Blog: Making confetti patches
cathygeier.blogspot.com/2014/05/tree-is-done-kind-of.htm

TQS Tutorial: Ricky Tims' Big Stitch Over Confetti
youtube.com


Now that you know all about confetti you are ready to create the "C" block of your project.  .

See you next month when Lorraine will present the yarn technique plus information about using tulle in your projects.

Thursday 13 October 2016

Piece 'E' - Natural Dyeing

We had a fabulous meeting with Linda and Sandie cooking up a storm in the kitchen. Alas, although it smelled tasty, we couldn't eat the end product. Once the dye was brought to a simmer, the fabric was added and simmered for 1-2 hr, taken out and rinsed. We were all rewarded with 2 pieces that we could take home.


Here is Linda's recipe for natural dyeing:

You will need: A dye pot (She got a stainless steel one from the thrift store), wooden spoon and sieve or strainer. These are not to be used for food consumption. You will also need fabric for dyeing, a good amount of plant material, water, soda ash and synthrapol or Blue Dawn dish soap.

Scour the fabric: The method to scour the fabric is slightly different whether you use wool, silk or cotton. The following instructions are for scouring cotton....Bring water to boil in the dye pot. Stir in 1 tbsp soda ash and 2 tsp dish soap, Stir to dissolve. Add fabric and simmer 1-2 hours to remove contaminates.  Cool slightly. Using gloves, rinse fabric well. Fabric can be added directly to dye liquid or dried to be used later.

Prepare the dye: Collect plant matter to be used for colorant. Put plant matter into the dye pot with water, simmer 1-2 hours. Let cool. This mixture can be left for a few days. Strain debris from liquid (debris can be added to compost). Return liquid to dye pot. Bring to a simmer, add 1-2 tsp of mordant (see below) and  stir to dissolve. Add recently scoured wet fabric, OR scoured fabric that has been soaking in water a minimum of 1 hr or overnight to dye pot.  DO NOT ADD DRY FABRIC. Simmer 1-2 hrs (or longer for a deeper color). Cool. This mixture can also be left in pot for a few days. Wearing rubber gloves, rinse well.  Air dry or use a dryer. Press as desired.

Mordants are minerals that are added to the material before dyeing or into the dye pot. They react chemically with the dye and enable the material to absorb the dye. They also improve the lightfastness and wash fast properties of the colour. Using different mordants can produce variations in colour and shade. The mordants most commonly used are alum, chrome, copper, iron and tin. Alum was used in our workshop. You can find it in the spice section of the supermarket.

Instead of plant matter, you can also use food stuff out of your kitchen (spices, tea, coffee, fruit)

WARNING! results may cause a need to explore and experiment further.

Resources:
//pioneerthinking.com/crafts/naturel-dyes
Wikipedia.org - naturel dyes
    Both of the above websites have a list of colors and what plant materials create those colors
maiwa.com - They sell products you can use for dyeing. They also have some information.
Handbook of Natural Plant Dyes by Sasha Duerr
Natural Dyeing by Jackie Crook
DVD: In search of Lost Colour - MAIWA productions (We will be watching this DVD sometime during the year)
Pinterest - Natural Dyeing

Now that you know a little bit about naturel dyeing you are ready to create the "E" block of your project.  You can either try dyeing your own piece and incorporate that into the "E" block or use the pieces you were given at the workshop.

See you next month when Cathy, Mary and Cath will present the confetti technique.


Naturally dyed wool


Friday 16 September 2016

Let's Get Organized

How exciting! My second post on the QuArtz Canada blog.

This (September) was our month to get organized. We have QuArtz(ies) signed up to present the various techniques. The sign up is as follows:

October - natural dyeing - Linda K and Sandie G
November - confetti - Cathy G-B and Mary M and Cath P
December - wool/string/tulle - Lorraine
January - collage/lettering - Brigitte R and Elisabeth R
February - modern/buttons - Catherine H and Val T
March - paint on fabric - Christine T and Shirley W
April - free month - time to work on that free block

My idea for attaching the pieces together was rejected. Various other ideas were explored and rejected as well.  We will have to make a decision at the October meeting so let's all get our creative juices flowing.........

Wednesday 20 July 2016

QuArtz Canada 2016-17 Project Overview


      Hello QuArtz(ies). Welcome to the 2016-17 season. We will be focusing on techniques this year. The ultimate goal for this project will be to end up with a wall hanging (or table runner). There are 3 components to be taken into consideration when planning for this project: 
 
      1)      We will focus on techniques. We will be looking for volunteers to present a particular technique each month. The presentation should include: what it is, examples of how to use it, instructions on how to do it and if possible ending with a hands-on workshop.  The techniques will be 1) confetti, 2) wool/string art, 3) natural dyeing, 4) painting on fabric, 5) collage and lettering on fabric, and 6) modern and button art. One or two people can work together on one presentation.
      
      2)      We all will be making the same sized wall hanging which has been divided into 7 blocks. Each block has been assigned a letter and that letter corresponds to a specific technique. After the presentation of a technique we will create the corresponding block using that technique. For example, if block C is painting on fabric, then after that presentation we will go home and complete block C using painting on fabric as one of the techniques in it. 

Each block must be completely finished using the pillowcase finish (i.e. no binding). The plan is that we can show our work either by technique (i.e. all block #1’s together) or by person (i.e. blocks 1-7 for one person). We are still working out how the blocks will actually be attached together so that we can display them. Suggestions would be appreciated.   

By the way, did you notice that there are 7 blocks but only 6 techniques? That's because the 7th block is a freebie. You can do whatever you want in that block.  
      
      3)      The theme will be ‘QuArtz does Canada” in honor of Canada’s 150th birthday. So, your piece must contain something that is distinctly Canadian. Examples that come to mind are: maple leaf, beaver, Anne of Green Gables, CN Tower, Canada goose, the Loonie, some other Canadian landmark. Also, each block must have a piece of red in it. 

       The colors and fabric you use for this project is entirely up to you, except that each block must contain some red.

So start getting those thinking caps on…. We will get organized at our September 13th meeting. So please come prepared to volunteer to present a technique. The first technique will be presented at the October 11th meeting.

Below is a schematic of the finished project showing where each technique has been assigned and the size of each block.  


April

 Spring is here and we are back again. Gallery Vertigo is having it's Grand Opening on Thursday April 11, 6 to 8 pm at the new location...