Showing posts with label texture. Show all posts

Wednesday, 16 May 2018

Hands On Encrusting

This month to follow on with our study of Texture, the group focussed on Encrusting.  To get started, Christine T. provided a stimulating JOLTZ exercise consisting of a circle divided into pie shapes.  Each participant was asked to fill in one pie segment within an allotted time (2 minutes) and then pass their "pie circle" onto their neighbour.  With each successive addition, we were asked to make sure that our additions connected to the one previous.  Sounds complicated?  Well here is what was generated.


Our apologies for the quality of the pictures, but pencil markings were difficult to capture.  You can however see that an interesting array of mandalas were created.

Cathy G-B followed this up with a detailed discussion about Encrusted.  Definition?  Cathy provided several:

  1. Cover (something) with a hard surface layer
  2. Form a crust
  3. Covered with something hard or decorative
  4. To decorate by inlaying or overlaying with a contrasting material

This last definition suited our purposes well.  Cathy had asked our members to consider a theme and  bring various items that would reflect our chosen theme along with two pieces of fabric within which to envelope our articles.  For example, a theme of seashore could include sea shells, pebbles, etc.; a theme of hardware could include bolts, screws, washers, etc.

Here is Cathy giving a demonstration of the various stitches that were used to encrust our various objects.
After some preliminary stitching, the group got to work trying out the various stitches that will be used in creating their encrusted pieces.
Some of the stitches used were:

  1. French Knot
  2. Colonial Knot
  3. Scroll Stitch
  4. Seed Stitch
  5. Bullion Knot
  6. Raised Cup Stitch

There are many others that can be used to decorate, but these were the basics.  If you are interested in exploring more stitches, there are several good websites that provide excellent tutorials.  Pintangle is one such website that has an excellent Stitch Dictionary.  Mary Corbet's Needle 'n Thread site has some excellent video tutorials.

Have fun exploring and we look forward to seeing what your encrusted pieces look like.

Friday, 27 April 2018

You Can Grow It?

At our last meeting, Jeanette produced an item that looked like leather from a distance, felt like those fruit roll-ups that kids use for a snack, but it turned out to be fabric.  Fabric that she had grown.  Yup!  You heard right.  You can grow fabric!  Hold on to your hats textile artists!!

Apparently using a brew of Kombucha culture known as Scoby, some plastic containers, heat and a dark place, you can grow a microbial fabric that has a texture varying from leather to papyrus.  Although it's tensile strength is strong, it has however one drawback; it's not waterproof or water resistant.

If you want to start your own "fabric laboratory"  here are some sites you may wish to visit to find out more.

https://www.thekitchn.com/how-to-make-your-own-kombucha-scoby-cooking-lessons-from-the-kitchn-202596

http://www.instructables.com/id/Kombucha-Fabric/

https://jennyy.com/what-next/

Sunday, 15 April 2018

Studying Texture and Encrusting

It's been a while since we have had additional information to post.  This past meeting, we enjoyed a stimulating creative exercise called " 30 circles" derived from UK Ed Chat.

We also began our study of texture and encrusting as it relates to visual art.  Mary, Elizabeth and Kay entertained us with information about the topic and provided a number of samples.  Here is what they discovered.

There are two styles of texture; visual and tactile.  So what does that mean in relation to our fibre art?

Tactile:  Is the fabric smooth like silk, or ribbed like corduroy?  This  can also include the weave of the fabric, the beading on it, or the stitching and any dimensional additions. 

Visual:  There is no actual texture on the surface, but rather gives the appearance of texture where no difference to the surface can be felt; e.g. a fabric printed with bark, droplets of water, or cracked concrete.

Here are some samples that Mary, Elizabeth and Kay produced for our group.  In this picture you can see the various different fabric textures that were used to create a tactile surface.


The postcard here has been stitched with fabric that has then been cut to create a chenille effect.

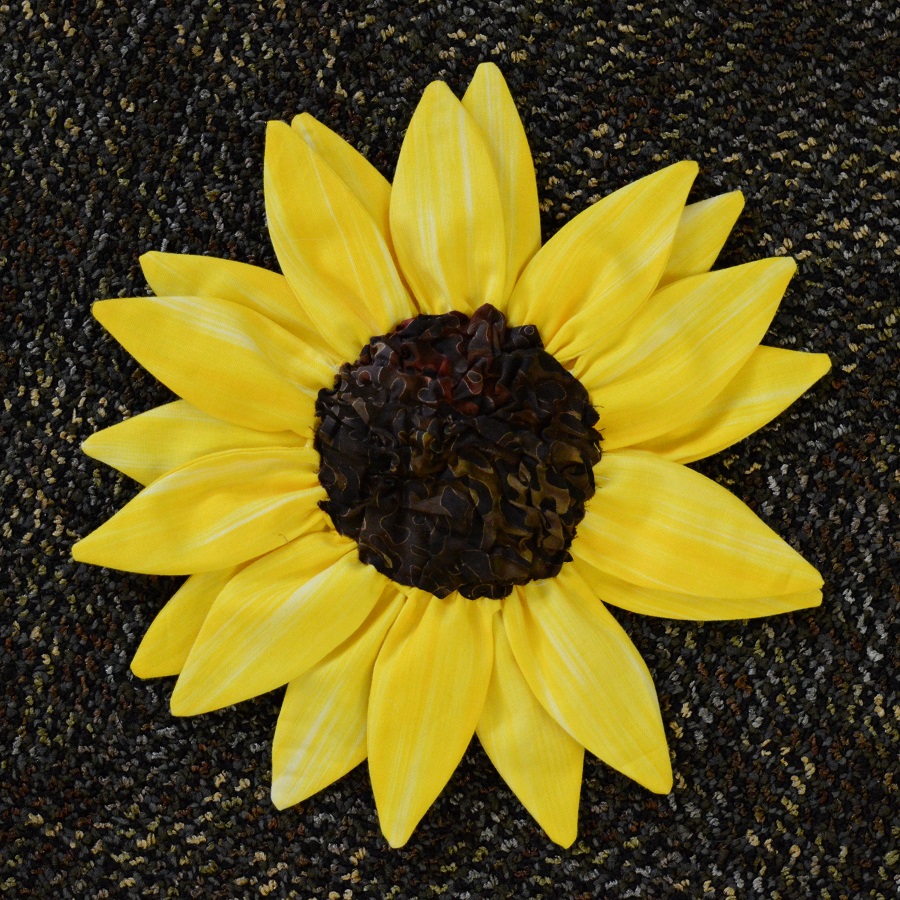
Another example showed the use of fabric texture created with a cooling rack to achieve a "nubbly" effect, which is used in the centre of the sunflower.  Texture Magic is a product that will also produce this effect.


In this example the horns of the figure are couched and the background is raw edge fabric stitched in place to create texture.

Consider using your twin needle to create texture as shown in this example.  Notice the ridges created by the stitching of the twin needle

Cathy provided an example of encrusting, another form of creating texture in our fibre art.  If an object is encrusted it is covered or overlaid with a coating or hard covering.  In our case, those coverings can include cheesecloth, cotton, organdy, organza, netting, or tulle.

On close inspection you can see buttons encrusted between fabric and stitched in place; cheesecloth encrusts additional little pieces.
A detail of the encrusted piece.
Ann Johnston in her book The Quilter's Book of Design writes; "Quilters have the advantage of being able to choose from a whole range of fabrics, embellishments, and quilting and construction techniques to achieve a wide variety of textures.  A hundred years ago quilters were taking advantage of fancy fabrics, embroidery stitches, paint, lace and ribbons.  We have even more options today."

Consider how couching, buttons, and puff paint might add to the texture of your textile piece.

Till the next time, happy stitching and creating.

Tuesday, 2 January 2018

What's up for 2017/18 year

We're a little late posting to our blog this year, but we're here now.

Last year we completed a project using various techniques to represent our interpretation of Canada's 150th year.  Here are some of the completed pieces.


If you click on the tab above marked "Canada 150 Project" you can read the artist statements for each of the pieces.

As for this year, here is what we have planned for this year.

Our first meeting took place in September and the group decided where their focus would be from a long list of various topics.  The result: we will be delving into the topics of Perspective, Illumination, and Texture/Encrusted.  We will be focusing on each topic through presentation, an outing to find and record physical examples in our environment, and a meeting to attempt to create an individual fibre piece demonstrating what we have learned.

Stay tuned and hope you come along for the journey.

September, the start of a new year!

Welcome back to all returning and new members!    "Art enables us to find ourselves and lose ourselves at the same time." Thomas M...