Wednesday, 22 March 2017

Piece "D" - Painting on Fabric


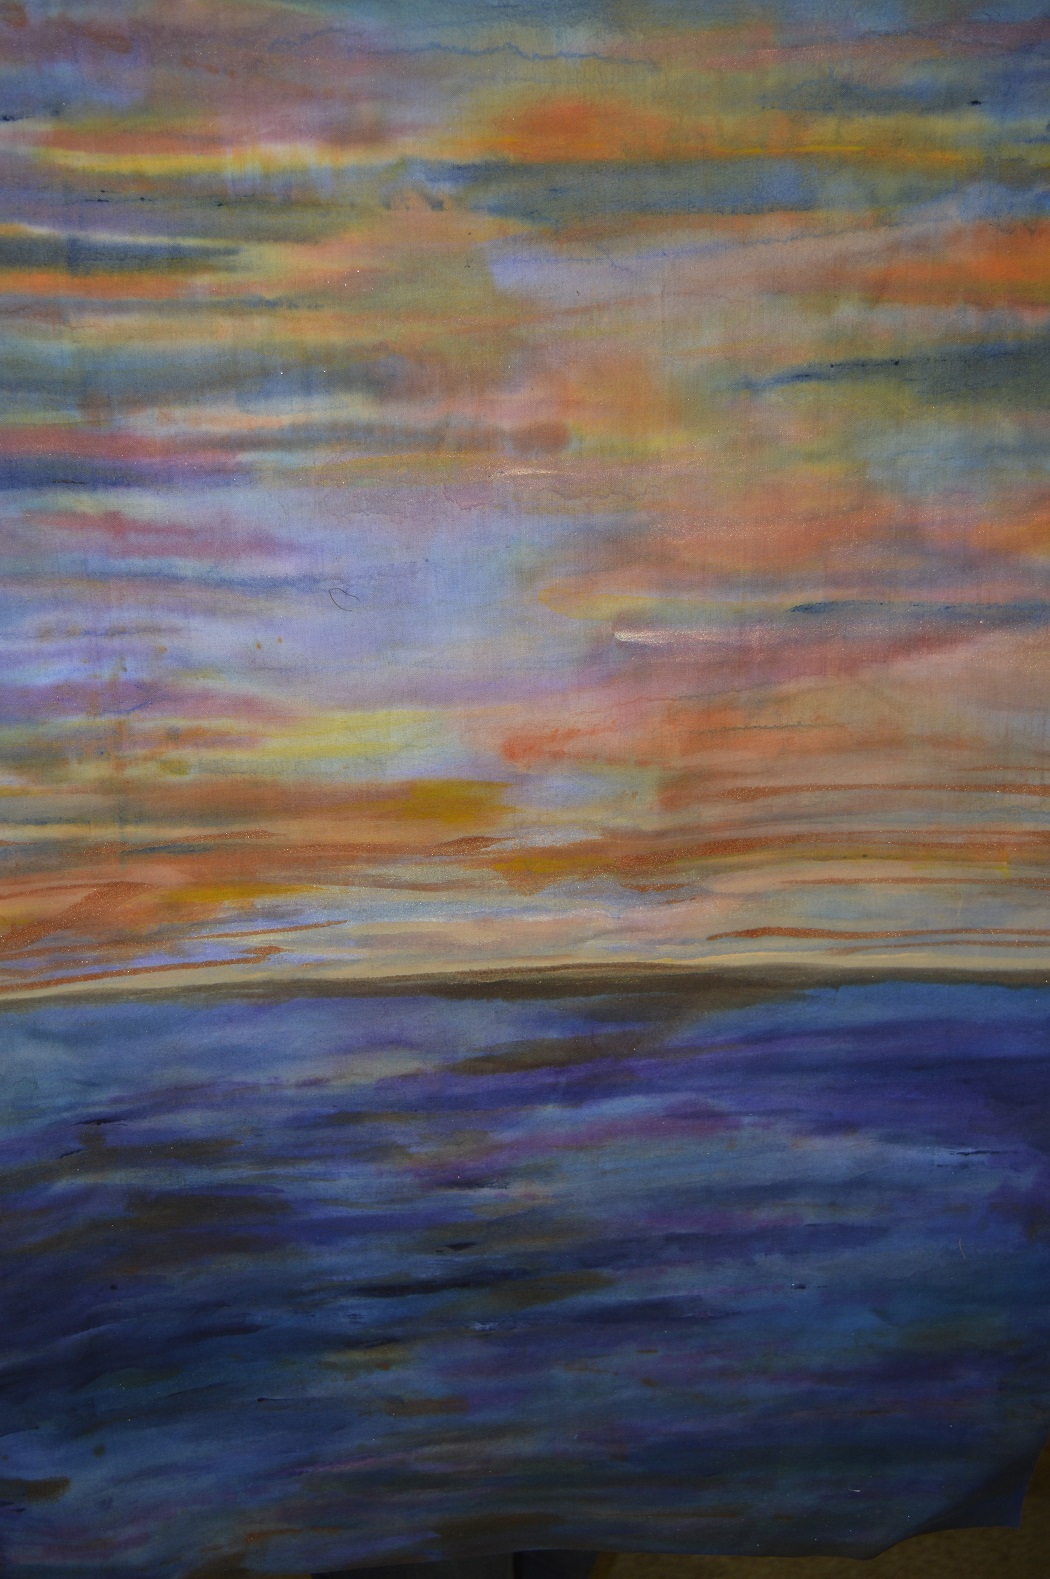
Fabric Painting


Why Paint on Fabric?

A.      Why Paint

a.       Self expression

b.      Another layer in fibre art

c.       Create colour combinations that are precisely what you need

d.      Puts visual texture exactly where you want it.

e.      Can use it for shading

f.        Convenient compared to dye

B.      Why fabric

a.       Express differently than on paper of canvas

b.      Can sew fabric afterwards

c.       Becomes washable with proper treatment i.e. heat setting

d.      Can stand alone or use for background or cut in pieces

C.      “Negatives” compared to dye

a.       Doesn’t bond to fabric the way dyes do

b.      Can end up rubbing off

c.       Can create sewing problems

d.      Can turn hard on the surface

e.      Need a fabric medium to create a bond (either already in at the manufacturer or added later.)

Applying the Paint

A.      Equipment

a.       Spread with brushes, foam, sponges, trowels, putty knives, spatulas, pencils, fingers, squeeze bottles

b.      Spray with airbrush, spray bottles

c.       Splatter, splash, dribble, flicker with toothbrush, brushes, squeeze bottle

d.      Monoprinting with gels, glass or plastic

e.      Stamping with stamps, foam, sponges, kitchen or office objects, leaves, etc

f.        Screen for screen-printing

B.      Resists

a.       Wax, stencils, packing tape, glue, painters tape, salt, flour, corn starch, oatmeal, rice

b.      Sun printing

Paint Brands

Different brands have different levels of colour saturation, different consistencies, different viscosity, and different adherence to the fabric. See Chart

Some require formatting for fabric. Some require additives or watering down with water or extenders or glazes.


Paint Types

A.      Acrylic Paints (sits on the surface)

B.      Watercolour paint and watercolour pencils

C.      Inks  - both in liquid form or solid

Transparency or Opacity

Transparent 

a.       Allows the cloth or undercoat to show through.

b.      Lighter transparent colours are usually applied first, followed by darker one to allow them to combine visually.

c.       Add white paint to increase opacity

d.      Complimentary colours become muddy where they overlay

Opaque

a.       Does not allow fabric or previous colours to show through

b.      Adding water lessens opacity

c.       Adding white lightens the colour but not the opacity

Note: Water allows the paint to spread on a fabric – thin paint will diffuse more readily than thick paint. Once the paint is dry its water content (viscosity) will no longer be a factor as only the colour is left. The more you have thinned it and therefore the further you have spread it the less colour will be left.

Paint thinned with water or applied to wet fabric will migrate easily. If two colours are wet when they meet, they will blend. Dry between applications if you don’t want them to blend.

Exception: Water colour pencils will blend if they become wet again.

Heat Setting

                Heat setting should be done in a well ventilated area because some noxious chemicals are released when heat is first applied. All fabric paints need to set and stabilize before washing. See chart.

Heat speeds up the process. Possible ways, depending on fabric and product include dryer, oven or iron.

Refer to Val’s article in the November newsletter to remove any residual chemicals or extra paint.


Fabric Types – things to consider

A.      Any type of fabric or blend will take paint

B.      White fabric will result in truer colours if transparent

C.      Natural or off white will give a yellowish cast

D.      Solid colours or prints will give different effects

E.       Thread count – a dense surface allows the paint to stay in place – good for a nice crisp stencil, while a less dense will allow the paint to migrate easier for blending or shading.


F.       Surface treatments prevent paint from being immediately absorbed. Consider whether to launder first depending on effects desired. Whether to iron first. Whether to have wet or dry.

Painting Surfaces

A.      Paint over hard smooth surface. (plastic or absorbent)

B.      Paint over surface with shape either soft or hard for effect

C.      Paint over air (as in a frame)

Hint:  A surface with a light padding is best for stamping.


Friday, 17 February 2017

Piece "G" - Modern/Buttons


History of Buttons

The first known button used about 5000 years ago, was made of shell. Buttons were originally used as a single embellishment or decoration on a closure, not in straight rows as we know today. Bone, horn, bronze, wood or woven leather were used to adorn the closure which was often knotted, pinned or buckled into place, but the button was still more decorative than functional. Functional button holes developed in the 1200’s.

The ornament became more prominent in the Middle Ages with closer fitting clothes – used to accentuate design and body lines. They attached via shank, leaving the front face free for decoration, carving, polishing and painting. A button-maker’s guild was first established in France in 1250. A sign of wealth, a button could sometimes be used to pay off a debt by plucking it from one’s attire.

After the Renaissance “habitat” buttons developed with dried flowers, hair cuttings or insects under glass. Miniature painting of elaborate scenes was common. Political buttons started to be used at George Washington’s presidential inauguration.  Box-like buttons have commonly been used to smuggle drugs, hide jewels, and contain miniature compasses.

Poorer folks made buttons for the wealthy, pouring molten lead or pewter into button moulds. Once set they could be covered in fabric or other embellishments. Circa 1800, with the Industrial Revolution, the button moulder’s laborious task became automated - steel dies were engraved into the shape of the day’s fashion, coverings were stamped out and 4 holes and a countersunk recess were stamped into the button centre giving us the typical profile we know of for a man’s dress shirt.

With the proliferation of buttons made by machines, even more were used to adorn clothing. They became smaller and spaced closer together spawning the need for buttonhooks in the 1850’s to aid in the closing of buttons through tight openings or loops. China, glass, vegetable ivory, celluloid, bakelite, and lucite materials were all used as button making developed from the early 1800s through the early 1900’s. Go to https://hobbylark.com/collecting/Vintage-Button-Guide-Ways-to-Indentify-Antique-Buttons to help identify vintage buttons.

It seems that with their association of dressing and undressing, opening and closing clothing near private parts of the body, their accentuation of body lines, buttons have become the subject of double entendre in everyday language. “Pressing one’s buttons”, “He’s all buttoned up”. On electrical devices, flat faced buttons are used to complete a circuit and Steve Jobs said the buttons on Apple’s touchscreens look so good “you’ll want to lick them”.


What is Modern Quilting?  (From Modern Quilt Guild website)
 
Quote: "Modern quilts are primarily functional and inspired by modern design. Modern quilters work in different styles and define modern quilting in different ways, but several characteristics often appear which may help identify a modern. These include, but are not limited to: the use of bold colours and prints, high contrast and graphic areas of solid color, improvisational piecing, minimalism, expansive negative space and alternate grid work. "Modern traditionalism" or the updating of classic quilt designs is also often seen in modern quilting.
Modern quilting has existed in many forms for much of the 20th century. It wasn't until the 2000's that quilts with a modern aesthetic began to appear in greater numbers and quilters began to describe themselves as modern.
A defining event occurred in 1998 when Martha Stewart Living featured Denyse Schmidt, calling  her quilts a "chic, modernist aesthetic". For many quilters in the early days of the movement, this was a key inspirational moment.
The growth of the movement was facilitated by four factors: the cultural shift of quality design being recognized by the general public, affordable digital cameras, the changing fabric industry and the rise of social media.
In 2002, the Quilts of Gee's Bend exhibit at the Museum of Fine Arts Houston and the publication of Yoshiko Jinzenji's book Quilt Artistry, further provided inspiration to a small but devoted group of modernist minded quilters.
Two influential books were published in 2005, Denyse Schmidt Quilts and the Modern Quilt Workshop by Weeks Ringle and Bill Kerr. The first online quilt alongs were established on blogs around these two books and awareness continued to increase in the online world.
The Flickr group Fresh Modern Quilts, established in 2008, provided the first online centralized social media venue for quilters in the movement. With that flickr group and many active blogs, the online world of modern quilting took off like wildfire.
In 2009 Alissa Haight Carlton and Latifah Saafir founded the Modern Quilt Guild giving the online community a chance to form in person connections with other modern quilters.


Tuesday, 17 January 2017

Piece "B" - Collage and Lettering

At our last meeting Brigitte and Elizabeth gave a wonderful presentation on the techniques of collage and lettering.  These two techniques are now to be used on your "B" pieces for this year's project that was initially discussed here.


Collage

The word “collage” comes from the French “coller” meaning to glue.  Used primarily in the visual arts, the artwork is made from an assemblage of different forms or bits, creating a whole new piece. Collages may include some or all of the following items
  1. magazine and newspaper clippings
  2. ribbons
  3. bits of colored or handmade papers
  4. portions of other artwork or texts
  5. photographs and other found objects.
Techniques of collage were first used around 200 BC in China with the invention of paper and later in the 10th century by Japanese calligraphers.

It appeared again in Medieval Europe during the 13th and 16th centuries where religious images, icons and coats of arms had gemstones and other precious metals added to create a new piece.

An 18th century example of collage art can be found in the work of Mary Delany.


The term collage was coined by both George Braque and Pablo Piccaso in the beginning of the 20th century when collage became a distinctive part of modern art.  

According to Wikipedia,  "in the Guggenheim Museum’s online article about collage, Braque took up the concept of collage itself before Picasso, applying it to charcoal drawings. Picasso adopted collage immediately after (and was perhaps indeed the first to use collage in paintings, as opposed to drawings):
"It was Braque who purchased a roll of simulated oak-grain wallpaper and began cutting out pieces of the paper and attaching them to his charcoal drawings. Picasso immediately began to make his own experiments in the new medium."
Surrealist artists have made extensive use of collage.  Cubomania is a type of collage in which an image is cut into squares and then reassembled automatically or at random."


Collage made from photographs, or parts of photographs, is called photomontage. Photomontage is the process (and result) of making a composite photograph by cutting and joining a number of other photographs. 
Richard Hamilton, Just what is it that makes today's homes so different, so appealing?  1956, collage, (one of the earliest works to be considered Pop Art)


In textiles

Given the definition of collage, one could easily argue that applique and crazy quilt construction are collages.  Some well-known textile artists that use collage in their work include Rosemary Eichorn, Judith Baker Montano, Elly Sienkiewicz, Susan Carlson, and Deborah Boschert, to name just a few. 

Unlike sewing clothing, or quilts from a specific pattern where your creativity is limited to choosing and combining colours and prints of your fabrics, collage gives you unlimited flexibility.  You won’t be restricted to one simple-shaped piece.  You will have the flexibility of choosing not only prints and colours, but also specific motifs from a variety of sources.  "No design has an edge too tightly curved, too pointy, or too complex to use; a host of subject matter is printed on fabric that can be used."
Finding inspiration for a collage begins with an idea.  This idea may reflect your interests, a particular piece of fabric that says jungles, a big life event, or even a personal challenge like working with a colour you don’t usually work with.  There are plenty of textiles with specific themes that can provide inspiration for a collage.  Details found in nature such as lichen on rocks can provide ideas for stitching texture patterns on a collage.

Mandy Patullo in her book Textile Collage describes collage in this way:

Fabric collage is a kind of patchwork but without having to follow a pattern, and a kind of applique without the templates.

In Collage + Cloth = Quilt, Judi Warrten Blaydon states:  “…collage can be a quick way to assess color, value contrasts, texture, scale, content, composition, …Seeing the collage allows you to make revisions and adjustments…"

How to Collage

a) Iron fusible webbing onto the fabric(s). Cut out the pieces. Lay the bits out onto your background. Use an iron to fuse them into place.
b) Cut out the pieces of fabric and lay them out onto the backing (batting, muslin or fabric of choice). Baste the pieces on or glue them on with a tiny dab of Elmer's washable glue. Quilt all over the piece to permanently attach the fabric pieces.


 Lettering

The possibilities are endless. You can:

  1. cut out letters from fabric and fuse it to a project
  2. use a stencil to paint letters onto a project 
  3. use beads to create letters
  4. stitch letters by hand or with a sewing machine
  5. draw letters and glue (or couch) braids or wool over them
  6. print on fabric/ribbon with ink for fabrics, permanent felt pens, calligraphy pens or a brush
  7. use brads to make letters
  8. attach buttons in the shape of letters or use buttons with letters on them
  9. use fabric  pieced alphabets (see Quilters Connection magazine - Summer 2016)


Monday, 19 December 2016

Piece 'F' - Yarn Painting / Transparent Overlays

Using transparent fabric

There are various types of transparent fabric that can provide may options for use as overlays.  Here are such a sampling as presented by Lorraine at our last meeting.

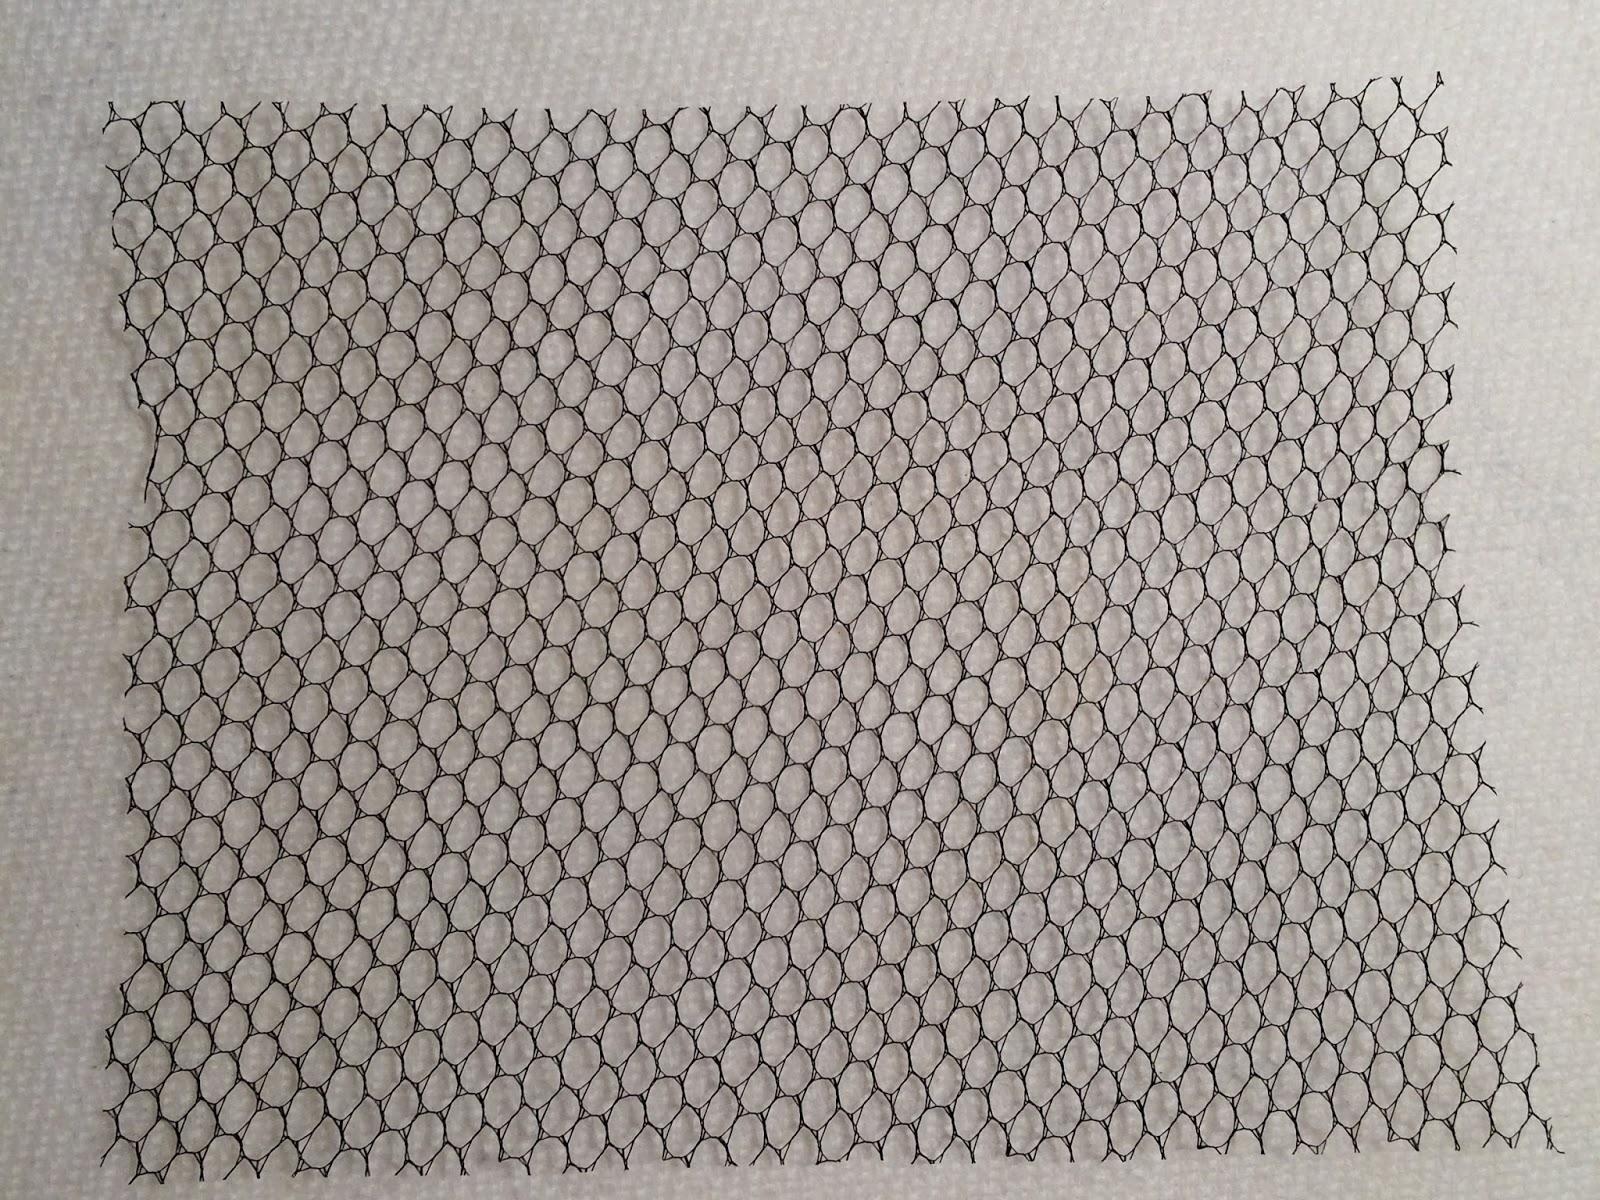
NETTING - a fabric that is knotted to form a mesh (not woven or knitted)
TULLE (Veiling) - hexagonal net (knotted) mesh.  This is a smaller mesh than netting.  It may melt with ironing and can be caught and torn.
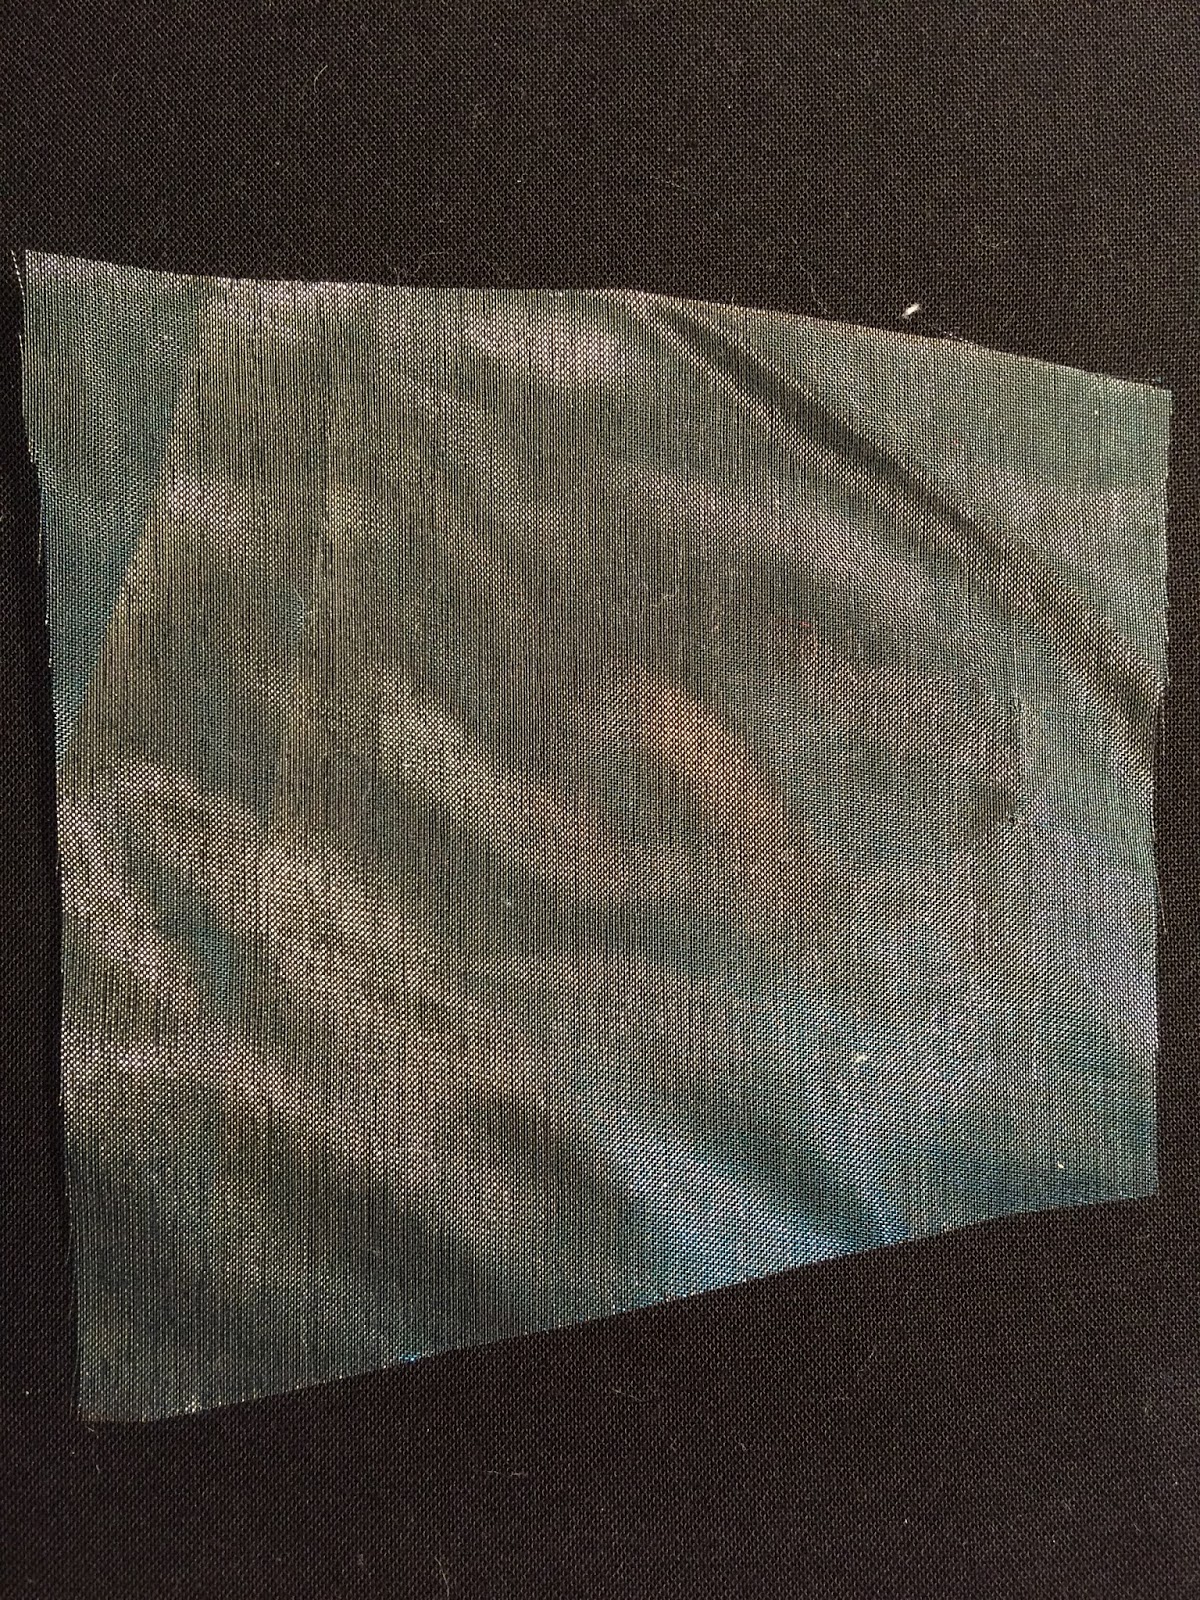
ORGANZA - fine, stiff, wiry, woven fabric.  This is typically silk, viscose (rayon) or polyester.  Similar to organza is organdy.  Organdy is made of cotton and used for interfacings.
CHIFFON is a plain weave, soft filmy fabric and may be made from silk, nylon, viscose, cotton or polyester.  Because it frays easily, it is best to sew on first and then cut close to the stitches, or lay it down using Mistyfuse.  It's also used for embellishing.
 
These transparent fabrics can be used as overlays to produce shading, holding fabric confetti or other items in place, mute the colour or properties of the colour underneath, or add texture.

Using Yarn / Thread


YARN - spun fibres used for knitting, weaving or sewing.  Some samples of yarn are:

Boucle - loops of fibres spun into a core of yarn

 Eyelash yarn - tuffed materials attached to a solid core of yarn
     

Chenille (French for caterpillar) is a yarn with a protruding pile around a core


THREAD - twisted filaments, fibres or fibrous material spun into a length, usually composed of two or more lengths twisted together.

Embroidery Thread - 2-6 ply, cotton, rayon, silk

Yarn or thread can be attached to your quilt by some of the following methods:

Couching - by machine or hand
Felting - needle or embellishing machine
Yarn piping - fold fabric in half, zigzag along the folded edge (this edge is your piping)
Secured under transparent overlay
     - lay down Misty Fuse on base (fabric or batting)
     - lay down yarn(s) in desired pattern
     - place tulle on top
     - stitch

Tips and Tricks Learned Today

Try sewing cording or yarn under the fabric.

Battlizer - batting and stabilizer combined in one product - can get it locally at Pleasant Valley Quilting.

To get the pieces squared for our project Cathy cuts out a piece of cardboard to the correct size. Once she has sewn the 'pillowcase' she turns the project right side out, slips the cardboard inside and then irons it.

Friday, 11 November 2016

About Fusible Fleece and Mistyfuse

There were a lot of questions during the demonstrations about using fusible fleece and Mistyfuse so here are some pointers about using each one.


Pellon 987F Fusible Fleece

Instruction for an applique design
  1. Trace a design/pattern to the non fusible side of the fleece, do not cut yet.
  2. Good idea to place a piece of parchment paper under the fleece, ease in transporting to the ironing board.
  3. Arrange the confetti on the fusible side spreading confetti over the border.
  4. Once you’re a happy with the confetti placement layer a piece of sheer fabric over the top.
  5. Now it's time to fuse the confetti to the fleece with a med-warm iron using parchment paper on top. Let it cool and then it's off to the sewing machine.
  6. I use a prewound bobbin with 60 weight thread and 60 weight thread on top. I like to bury the stippling. Upper thread colour is up to you.
  7. Once the stippling is finished cut the design out and fuse to the main quilt top with a satin stitch or free motion back and forth stitch.
Mistyfuse®

Use paperless Mistyfuse® for all weights of fabric from velvet and cotton to delicate tulle and organza.  It's a dream to work with—it handles well, is incredibly sheer, doesn't add bulk and bonds firmly once cooled.  Since there is no added adhesive, it will never gum up your scissors or quilting needles.  Mistyfuse can be used with very sheer fabrics and lower temperatures.

Each package comes with simple instructions for easy fusing with no waste.  Mistyfuse White is perfect for fusing all colors, weights and types of fabric.  Mistyfuse performs the same function as other fusible web products but is very sheer, light weight and does not add stiffness or bulk to the layers of fabric joined. Unlike other fusible web products, Mistyfuse does not have a paper backing.  The absence of a paper backing on Mistyfuse means that you cannot draw your design onto the paper and must therefore use templates when cutting specific shapes from Mistyfuse. Another necessity when using Mistyfuse is a non-stick pressing sheet or parchment paper in order to prevent the Mistyfuse from sticking to your iron or ironing board.


1. Draw your design or applique shape onto freezer paper. Do not reverse.
2. Fuse Mistyfuse to the wrong side of your applique fabric.

  • Use parchment paper or a non-stick pressing sheet to cover your ironing surface
  • Place Mistyfuse on the non-stick sheet
  • Place the applique fabric right side up (wrong side against the fusible) to cover the Mistyfuse completely
  • Press briefly using medium-low heat setting.
  • Fuse a larger piece of fabric than your planned applique piece. Often, people who like using Mistyfuse will pre-fuse larger pieces of fabric so they are ready to cut out for future projects.

3. Press the freezer paper template to the right side of the pre-fused fabric and cut it out. Keep the nonstick sheet under the fusible side of the Misty Fuse.

4. Position the applique and press with medium-high heat to permanently fuse.

Things to remember when using Misty Fuse:


  • It has no paper backing so you MUST use a non-stick pressing sheet (Teflon sheet or parchment paper)
  • It can be used with sheers
  • You will need to make templates if you are making specific shapes
  • You do not need to reverse your design when you draw the design onto freezer paper because the freezer paper will be attached to the right side of the fabric (not flipped).


Piece 'C' - Fabric Confetti

It is done by layering very small pieces of fabric on a backing to create your design.

International fibre artist Noriko Endo uses toothpick sized fabric pieces to create landscapes on cloth that invoke the feeling of Impressionist paintings. Her book Confetti Naturescapes is in the Vernon library.
Confetti is used to add texture, fullness or just to highlight an area.

You can embroider on the confetti and sheer toppings with a design.

There are no limits for using confetti.
 
Cathy G B showed us how to make a forest scene with confetti. She uses very small pieces of fabric, batik, silk etc. (anything that you can use either side of is best).
Cut fabric for confetti
Cut batting the size of your finished quilt, cut backing 1” larger.
Cut the fabric for confetti into larger strips about 20” x 1”, you can layer up to 4 fabric pieces at a time. With your rotary cutter cut the strips into toothpicks, 1/4” squares or totally random shapes.


Put each colour into a different container, ice cube trays work well or small dishes.

Noriko places confetti directly onto the batting, which takes a lot of confetti. Cathy prefers to place the confetti onto a background fabric.


Layer the confetti onto the background until your design is complete. In this demo some solid tree trunks were added as well. A skewer, chopstick, tweezers or similar tool help in moving the confetti into place.

 
Cover with tulle, try different colours but black often works well, pin well and free motion quilt. Match the thread and bobbin to fabric colour you are stitching. Stitch however you free motion stitch, and zigzag on trunks of trees in a highlighting colour.

Noriko Endo often covers her piece in tulle, adds more confetti and then another layer of tulle before stitching.
Discussing which elements of good design are found in the pieces

 Mary M discussed using confetti to make a piece and then appliqué it onto the quilt top. She had a cheerful snowman scene with the tulle behind the confetti appliqué piece and used a sheer over the confetti that gave a gauzy effect.


Cath P covered ‘snippets’ - larger pieces backed with fusible web and carefully placed. These can be random cuts or more specific shapes, e.g.: feathers, flower petals, leaves etc. Tulle can often be omitted with this technique. Parchment paper or a Teflon sheet is recommended when fusing the pieces down, you never get them all the right way up!


A work in progress


Tools for making confetti
Decide on picture, sketch it out onto your background or batting.
Add background fabrics if you wish. Spray baste or Misty Fuse can also be used on the background with larger pieces. Or you can work on the Fusible Fleece.
Place confetti, building up layers until you are satisfied.
Pin well and stitch around outside edge to hold confetti in. Then free motion stitch over top.
Confetti can also be used with dissolvable stabilizer. Sandwich fabric confetti, ribbons etc. between two pieces of stabilizer. You can make it very dense for tree tops or just a few pieces for the last autumn leaves.
Confetti tree


Free motion or zigzag over top. Be sure to stitch through all the pieces
Rinse out well and let dry.
You can pin it to a Styrofoam meat tray to shape it as it dries.
The piece can be cut to smaller size and shapes.
Sew on to quilt top.

It is a great way to add some dimension to trees and flowers.

Websites to check out:

Noriko Endo norkioendo.com

Subversive Stitchers subversivestitch.blogspot.ca July 2009

Confetti Backgrounds for Art Quilts Quilting Daily Blog March 22, 2016
www.quiltingdaily.com/blog/confetti-backgrounds-for-art-quilts

Cathy Geier’s Quilty Art Blog: Making confetti patches
cathygeier.blogspot.com/2014/05/tree-is-done-kind-of.htm

TQS Tutorial: Ricky Tims' Big Stitch Over Confetti
youtube.com


Now that you know all about confetti you are ready to create the "C" block of your project.  .

See you next month when Lorraine will present the yarn technique plus information about using tulle in your projects.

Thursday, 13 October 2016

Piece 'E' - Natural Dyeing

We had a fabulous meeting with Linda and Sandie cooking up a storm in the kitchen. Alas, although it smelled tasty, we couldn't eat the end product. Once the dye was brought to a simmer, the fabric was added and simmered for 1-2 hr, taken out and rinsed. We were all rewarded with 2 pieces that we could take home.


Here is Linda's recipe for natural dyeing:

You will need: A dye pot (She got a stainless steel one from the thrift store), wooden spoon and sieve or strainer. These are not to be used for food consumption. You will also need fabric for dyeing, a good amount of plant material, water, soda ash and synthrapol or Blue Dawn dish soap.

Scour the fabric: The method to scour the fabric is slightly different whether you use wool, silk or cotton. The following instructions are for scouring cotton....Bring water to boil in the dye pot. Stir in 1 tbsp soda ash and 2 tsp dish soap, Stir to dissolve. Add fabric and simmer 1-2 hours to remove contaminates.  Cool slightly. Using gloves, rinse fabric well. Fabric can be added directly to dye liquid or dried to be used later.

Prepare the dye: Collect plant matter to be used for colorant. Put plant matter into the dye pot with water, simmer 1-2 hours. Let cool. This mixture can be left for a few days. Strain debris from liquid (debris can be added to compost). Return liquid to dye pot. Bring to a simmer, add 1-2 tsp of mordant (see below) and  stir to dissolve. Add recently scoured wet fabric, OR scoured fabric that has been soaking in water a minimum of 1 hr or overnight to dye pot.  DO NOT ADD DRY FABRIC. Simmer 1-2 hrs (or longer for a deeper color). Cool. This mixture can also be left in pot for a few days. Wearing rubber gloves, rinse well.  Air dry or use a dryer. Press as desired.

Mordants are minerals that are added to the material before dyeing or into the dye pot. They react chemically with the dye and enable the material to absorb the dye. They also improve the lightfastness and wash fast properties of the colour. Using different mordants can produce variations in colour and shade. The mordants most commonly used are alum, chrome, copper, iron and tin. Alum was used in our workshop. You can find it in the spice section of the supermarket.

Instead of plant matter, you can also use food stuff out of your kitchen (spices, tea, coffee, fruit)

WARNING! results may cause a need to explore and experiment further.

Resources:
//pioneerthinking.com/crafts/naturel-dyes
Wikipedia.org - naturel dyes
    Both of the above websites have a list of colors and what plant materials create those colors
maiwa.com - They sell products you can use for dyeing. They also have some information.
Handbook of Natural Plant Dyes by Sasha Duerr
Natural Dyeing by Jackie Crook
DVD: In search of Lost Colour - MAIWA productions (We will be watching this DVD sometime during the year)
Pinterest - Natural Dyeing

Now that you know a little bit about naturel dyeing you are ready to create the "E" block of your project.  You can either try dyeing your own piece and incorporate that into the "E" block or use the pieces you were given at the workshop.

See you next month when Cathy, Mary and Cath will present the confetti technique.


Naturally dyed wool


September, the start of a new year!

Welcome back to all returning and new members!    "Art enables us to find ourselves and lose ourselves at the same time." Thomas M...